Recording Vocals – 10 Top Tips
Whether you’re recording vocals in a professional studio or a home setup, capturing pristine and compelling vocal performances is key to the success of your track. Here are ten invaluable tips to help you capture stunning vocal performances in any environment:
1 – Create a Controlled Recording Space:
The space you record your vocals In has probably the greatest influence over the sound of your vocal recordings. In a professional studio, acoustic treatment is generally a given. At home, consider soundproofing your recording space to minimize external noise. Use rugs, curtains, or acoustic panels to dampen sound reflections and room reverberation. Microphone Isolation shields can also provide effective acoustic dampening. Such shields are ideal in spaces where acoustic treatment is not possible. You could even buy or build yourself a fully enclosed recording booth (see below)

2 – Microphone Selection:
Choosing the right microphone is the foundation of a successful vocal recording. In a professional studio, you’ll have access to a range of high-quality microphones, including condenser and dynamic mics. In a home studio, it’s essential to invest in a good-quality microphone that suits your budget. Condenser microphones are a popular choice for their sensitivity and clarity, making them perfect for recording vocals.
Check out our ‘Build a Studio on a Budget: Top 7 Budget Studio Microphones’ Blog post for some great mic options.
3 – Proper Mic Placement:
Experiment with microphone placement to find the best position for your vocals. Typically, placing the microphone slightly above mouth level and pointing down or off to the side can reduce plosives and capture a natural sound. Keep a good distance to prevent distortion while maintaining the intimacy of the performance. Whilst recording, it’s important to keep an eye on the vocalist to make sure they maintain a constant distance from the mic.
4 – Use a Pop Shield:
Plosive sounds like ‘p’ and ‘b’ can cause unwanted bursts of air, distorting the recording. A pop shield/filter placed in front of the microphone helps diffuse these sounds. It’s a simple and cost-effective solution to significantly improve the quality of your vocal recordings. If you’re in a session and you don’t have access to a purpose-made pop shield you can improvise with a pair of thick tights stretched over something.

5 – Headphone monitoring:
Headphones play an essential part in the recording of professional vocals. For you as the producer/engineer, they provide accurate audio representation allowing you to monitor the recording in an isolated environment that will not be picked up by the mic The vocalist will also need headphones in order to hear the backing track and their own performance clearly. In this instance, I would strongly advise using a closed-back headphone. This will prevent sound from spilling out of the headphones and bleeding into the recording.
Providing the vocalist with a comfortable headphone mix is also essential. They should hear the backing track and their voice with a good balance, helping them stay in tune and deliver a confident performance.
6 – Set the Right Levels when recording vocals:
Adjust the microphone’s input gain correctly. Avoid recording too hot, which leads to distortion, or too soft, which can result in unwanted noise. Regularly monitor the input levels and make adjustments as needed, especially in a home studio where you might not have an engineer. Some people choose to use vocal channels and process the incoming signal with EQ and Compression. If using a voice channel exercise extreme caution and only apply very subtle values. Remember, any over-processing at this stage cannot be undone.
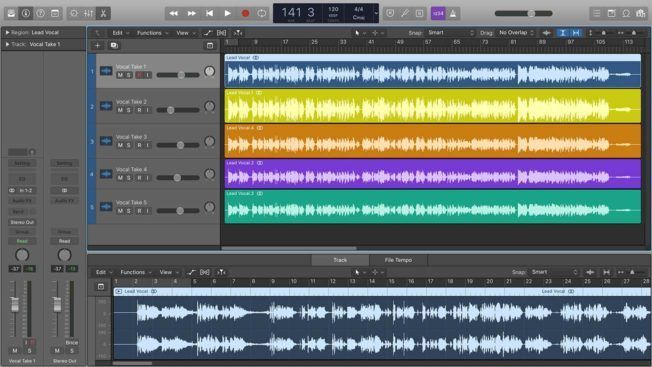
7 – Multiple Takes for Perfection:
When recording vocals don’t hesitate to record multiple takes of the same passage. This allows the vocalist to experiment with phrasing and emotions, leading to a more dynamic and expressive performance. Later, you can comp the best parts from different takes to create a polished final recording.
8 – Room Ambience:
Pay attention to the ambience in your recording space. Turn off fans, air conditioning, and other noisy appliances. Some more powerful desktop computers have noisy cooling fans. Do your best to dampen the noise from these fans whilst recording. If the noise-dampening method involves blocking airflow to the computer make sure you remove any such dampening materials when not recording.
If recording in a home studio, inform others in your household about the recording session to minimize disruptions. A quiet environment is essential for capturing clean vocals
9 – Create a relaxed atmosphere:
Whether in a professional studio or at home, create a comfortable and encouraging atmosphere for the vocalist. Positive vibes and a relaxed environment can significantly enhance the performance. Offer water and breaks if needed, ensuring the artist feels at ease during the recording process. Given that singing or rapping is a highly emotional endeavour, it’s crucial to ensure that the vocalist is entirely comfortable and in a positive frame of mind when recording vocals, as it will significantly shape the final delivery.

10 – Post Recording
After the recording session, use post-production tools wisely. Effects like reverb or compression can enhance the vocals. Remember to exercise caution though as too much reverb or compression can easily overwhelm a vocal. Careful audio editing can help fix any slight timing discrepancies. If you have multiple tracks available there may be takes where the tone and delivery are superior but the timing is not quite as on point. Always go for these takes as you can use warping and editing techniques to fix the timing issues.
Recording Vocals – Summary
In conclusion, recording vocals successfully, be it in a professional studio or a home setup, requires a combination of suitable equipment, technical ability, creativity, and a supportive environment. Remember that practice and experimentation are key. Don’t hesitate to try a variety of techniques and fine-tune your approach to suit the different situations and recording environments that arise from recording vocalists. Following these ten tips should give you the foundations necessary to achieve professional-quality vocal recordings every time. Happy recording!
Remember – RouteNote Create subscriptions start from as little as $2.99. You also get 10 FREE credits to spend on samples along with access to our FREE sample pack bundle when you sign-up!