
How to Organise Your Sample Library

As a producer these days, we have an abundance of one-shot samples and loops at our fingertips, but how do you go about organising your sounds so that you’re not spending hours searching through your library during a production, and spending more time on your music?
File Hierarchy
A great way to start is to build a file hierarchy that makes sense to you. A couple ways we recommend is to sort your samples first of all by manufacturer/company or by music genre. This should make it easier to see where the samples came from, or if you are producing a certain genre, where to find samples that will likely fit what you’re trying to produce.
Split them down
Within these new folders, we’re now going to start creating sub-folders for each particular set of sounds in the pack. Split these down into things such as Snares, Hi-Hats, Synths, Foley etc. How granular you get into this is completely up to you, but the more specific you are, the more likely you are to be able to find what you’re looking for in the middle of a production. You could go as far as to split the sounds down into tonality, timbre or feel.
Using DAW Search Functionality to your advantage
Your DAW has a search functionality. Use this to your advantage to find exactly what you need, when you need it. You’ve already done all the hard work by sorting your sample hierarchy beforehand. In this example we’ll use Ableton Live’s search tool –
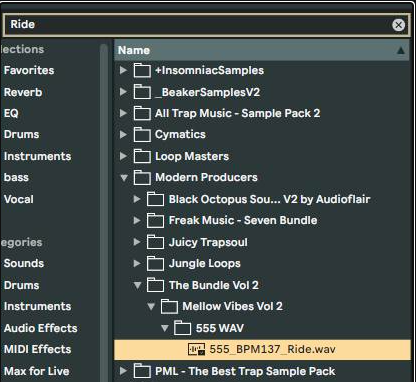
Keyboard shortcuts are your best friend for a snappy workflow in your DAW, so highlight your main samples folder in the left hand toolbar and press (⌘ + F) or (ctrl + F) – This is the keyboard shortcut for the search function. (I like to remember this shortcut by calling it the FIND function). Simply type the word of the sound that you want and hey presto! All your prep work beforehand was worth it! You now can easily scour and preview your sorted sounds for quick and easy access using the (↑ ↓ ← →) arrows on your keyboard.