How to Use Your EQ to Emulate Psychoacoustics and Create Width and Depth in Your Mix
The stereo field is the ingenious creation of Alan Blumlein. From left to right and front to back, the step field is about space.
But how do we create space in our mix? Well, there is a multitude of ways that include filters, EQ‘s, panning and gain staging. This article, my humble mix engineer, is dedicated to using EQ’s to create both width and depth in your stereo field.
Using EQ to Manipilate Distance (Depth)
First up, depth. You know, the front to back bit in your stereo field…
When you’re vibing with your friends at the festival you’ve all been talking about for the past year, there’s a common experience you and everyone else has. That experience is the muffled stage sound you hear when you’re approaching the stage from the back of the crowd. You know where the stage is – it’s in front of you. But the sound is muffled because you’re so far away. You’re hearing more bass than anything else, and this happens because air absorbs high frequencies faster than low frequencies. The further away you are means you’re hearing more low frequencies than anything else.
So, let’s talk about how to use this niche of psychoacoustic in your music.
With your EQ, it’s actually pretty easy to make things seem further away or closer in your mix. Well, from your listeners perspective, that is.
Use a low pass filter to roll off the high end of a sound, and you’ll soon notice that it seems further away than other elements in your mix. But be cautious that you don’t get rid of too much high-end and actually muddy the sound. Actively listen to what you’re doing to the sound as you do it. And don’t be afraid to take a break and give your ears a break!
You can also use a high pass filter to roll off some low end of the sound. This will reinforce the effect of the sound being further away as low-end frequencies also get absorbed by air the further you are from a sound.
It also gives your bass channels more room to work!
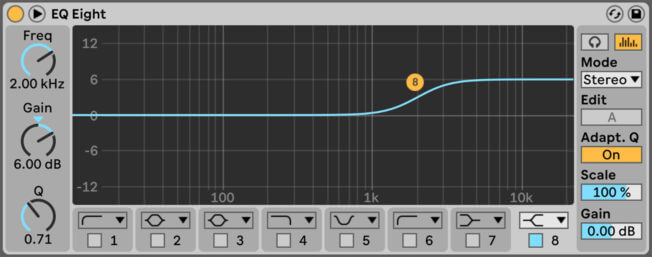
If you want a particular element to sound closer to the listener and not further away, boost the higher frequencies of the sound in question. That is, boost somewhere between 5kHz and 10kHz. 5kHz to 10kHz is your high-end frequency range, while 10kHz to 20kHz are your “air” frequencies. Boosting between 5kHz and 10kHz will accentuate the upper bodies of your sounds and also the effect of reverb and delay (as this is where the frequencies of those effects live) will receive a boost too.
With the use of a high shelf EQ, you can make these sounds seem brighter and therefore closer to the listener. Be cautious though, as you may only need a subtle boost and too much will give the sound a harsh effect!
However, if you do end up with a harsher sound, you could also use a de-esser to tame any sibilance and not compromise the detail of the high-end.

Using an EQ for Width
We can also use EQ’s to control where our listeners will perceive our sounds in the full width of the stereo field.
To do this, we need a mid/side EQ. Mid/side EQ’s allow us to create separation between tracks via converting an input stereo signal into two individual stereo and mono signals.
Our ears are more sensitive to high frequencies. Due to this, our ears are better at pinpointing the location of sounds with high-frequency content compared to low-frequency sounds.
On the football pitch, you can tell where the coach is because they’re whistling. Your ears can pinpoint where that high pitch whistle is blasting from. But can pinpoint where the thunder is coming from?
Because of this, we can create separation in our mix by keeping all bass frequencies in the centre of our stereo image but having everything else panned. Our ears are more accustomed to hearing high frequencies in stereo and bass frequencies in mono, so your mix won’t sound imbalanced.
With a mid/side EQ such as MIXROOM, a personal favourite of mine, you can dedicate a whole band to frequencies below 300Hz with bandwidth controls.
In MIXROOM, you can hover over the dB readout and you’ll see the stereo icon appear below it. By clicking the “M” on the left side, you can switch this band to “Mid” and then give it a subtle boost to really focus the listener on the low-end in the centre of the stereo field.
Now that your low frequencies are in the centre, it’s time to spit the highs. Create another band in the high-end (between 5kHz-10kHz) and use the bandwidth and frequency controls to zero in on these frequencies.
Now, rather than “M”, click the “S” below the dB readout to convert this band into “sides only”.
There you go, you have a wide mix. There are a few controls at your disposal to get the perfect blend between the two, but a mid/side EQ is your best bet to create effective width in your mix.
Looking for some great sounds to level your EQ skills up? Well, we’ve got you.
We at Mixxed work with a growing number of sample labels and contributors to provide you with an affordable sample subscription service that’s more accessible than any before.
You’ll have access to our growing catalogue of thousands of loops, one-shots and sound effects that you can browse, download and keep forever for less than $3 a month.
Sign up today to find your sound!
