
How to Master Electronic Music for Beginners
Before you do anything in the master stage, remember that the core philosophy of mastering music is that less is more.
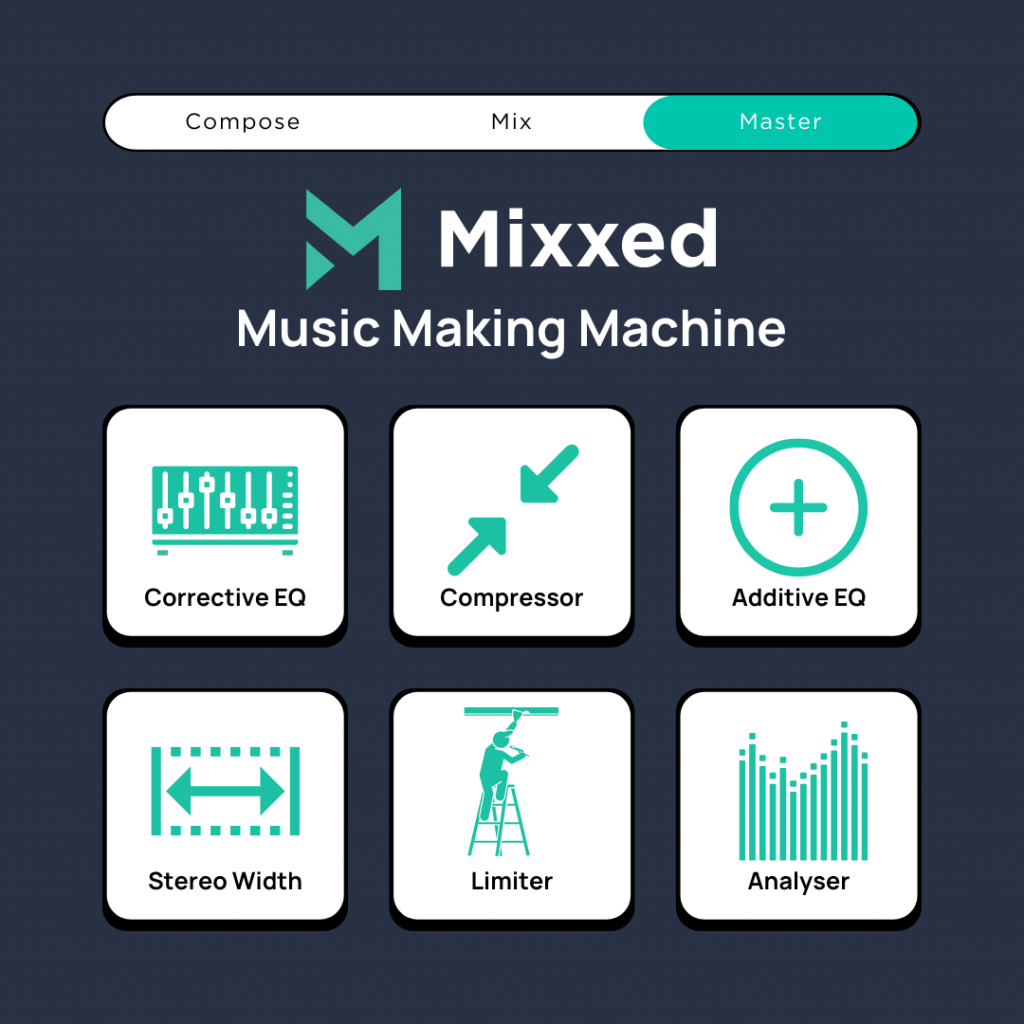
Now that your composing and mixing stages are out of the way, it’s time that you learn how to master music. Whether you’re in Ableton, FL Studio, Cubase, Studio One, or any DAW, the mastering process is the same.
We all know the temptation of making your work & skills loud and obvious – but subtlety is louder and more professional. Whatever changes in the mastering stage shouldn’t be obvious or extremely noticeable.
In mastering, EQ adjustments are more about broad band changes across your lows, mids and highs. So it’s better to have all corrective EQ finished in the multitrack mixing stage, which is why we have featured it as the beginning stage in this infographic. If your track is still made up of multitracks, bounce them down into stems -drums, bass, vocal, and instrument groups.
Therefore, we’re going to jump straight into compression.
Master Your Music: Subtle Compression
A good rule to follow with compression is to reach a point that you’re satisfied with and then dial it back by about 2-3 dB. But you don’t need to follow this philosophy religiously. You may attenuate the signal by only 1 dB or 2 dB. The point here is that dialling your signal back slightly preserves your headroom. And headroom is your best friend!
Take a listen to each individual channel and make sure each one has enough compression. After that, take a look at each of your bus groupings too. Do your groups sound like they’re working together? For example, sending your drum group through the same compressor instance will make them sound like they’re working together! This technique also holds true for each of your groups.
Once you’re content with the compression on your channels and groups, look at your master bus and compress the song as a whole.
Like we said earlier, less is more. When using compression as a “glue” you only need the slightest amount. To be more specific, you need no more than a few decibels of gain reduction with a high threshold and low ratio. If you use any more then you’ll risk getting weird pumping sensations and unnatural dynamics!
Use Broad EQ Sweeps in Your Master
It’s time to move on and look for what your track is missing or could do with more of. Critically listen to your track and listen for what the track is missing. Remember – we’re applying broad band EQ adjustments here.
Take note of areas that need more clarity in both your stems and the track as a whole. Do your vocals need more air? Do your instruments need some more warmth? How are your drums sounding? Perhaps there is too much muddiness or boominess in your bass?
To get a better idea of what your mid and high range frequencies are up to, simply turn off or mute your bass channels. And to get a better idea of what your low end is doing, mute your mids and highs.
Solo’ing your tracks in this way provides you with a much clearer picture of what’s actually happening in your mixdown.
With only your low end and kick drum playing, look for the following two common problems:
Is there too much or too little sub-bass?
If there’s too much, use a high pass roll-off or subtle gain attenuation to declutter your low end. If it is too little, look to use upwards compression or an expander and see if it solves your problem.
Is there enough clarity between your kick & bass?
This problem has an easy solution: sidechain compression! You could also manipulate the attack of the kick with a compressor, or even tweak the EQ of both stems.
In essence, this stage is looking at each of your stems and filling up empty space.
Adding Stereo Width
As with adding compression, here it’s equally important to be careful. Less is more because you don’t want to have too much empty space between your left, centre, and right channels. An LCR mix, for example, sees all things hard-panned left and right, and dead centre with nothing in between.
There are stereo widening plugins that you can use here, but you may find all you need in a mid-side EQ.
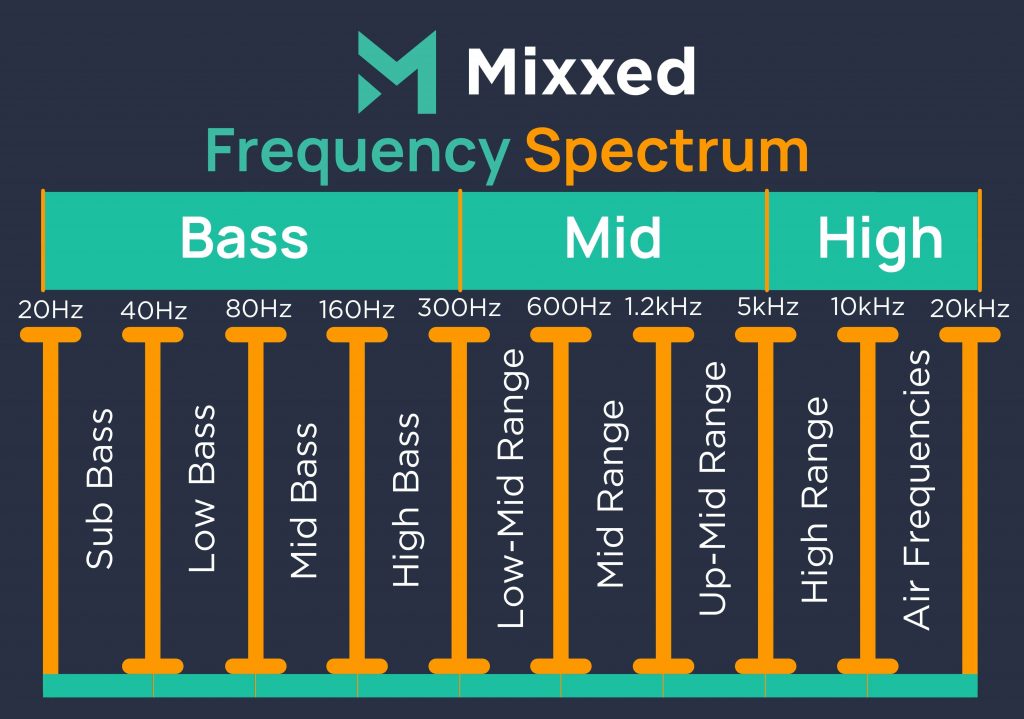
As a rule of thumb, all frequencies below 300Hz should be mono. Anything above 300hz can be panned left and right across your stereo field. Keep your vocals and drums in the centre to provide a framework for your other elements! Additionally, listen out for elements that may be clashing or masking one another. Try panning one element to one side or the other until they’re no longer clashing.
More Compression
Before you jump in and start limiting, look at using a multiband compressor on your master channel.
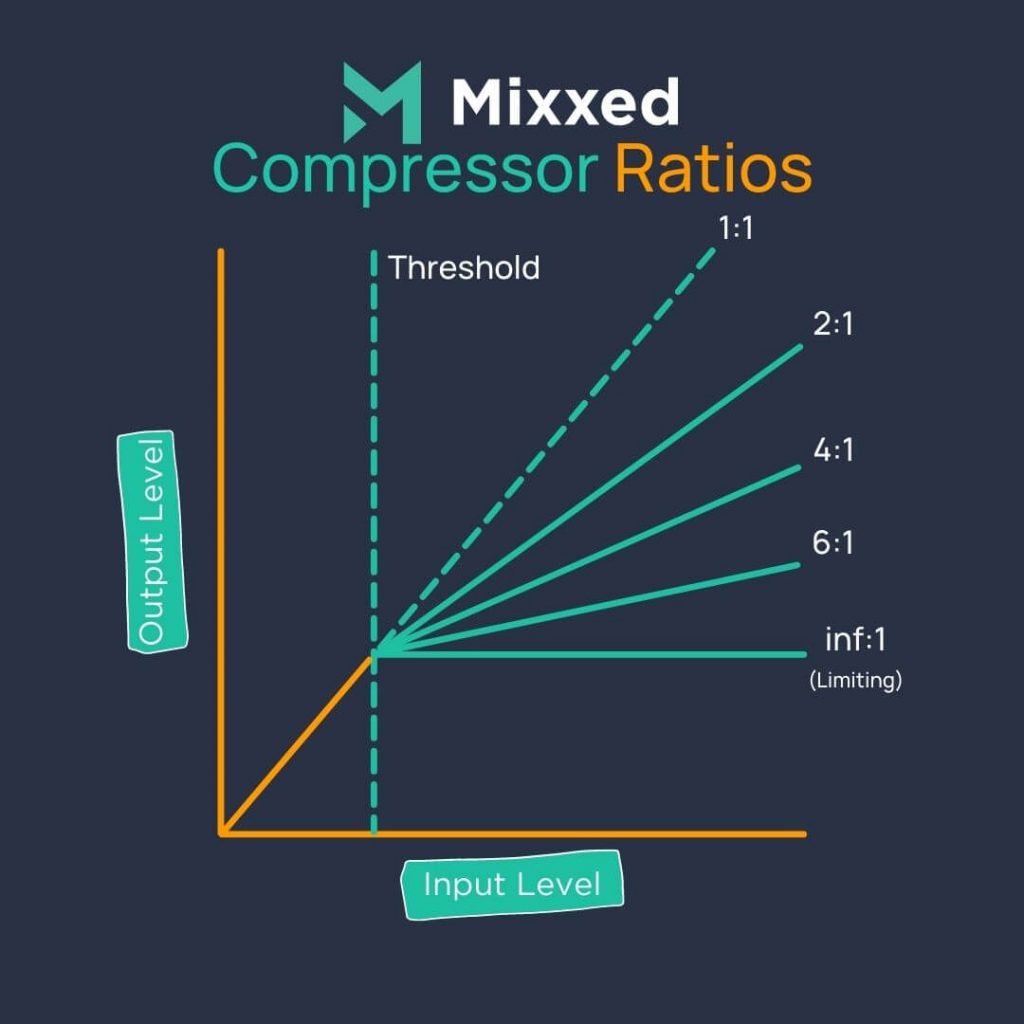
A multiband compressor allows you to target specific frequency bands and apply compression accordingly. You can dig into your stereo mix and reshape and/or balance out the volumes of specific frequencies in your track.
A classic example is that a kick drum is too loud. If you find yours is, you can isolate the specific range of its fundamental frequencies and compress them down a notch. Using an EQ here is an option, but you’d lose the “momentary action” if you applied it to the whole track (unless you use a dynamic EQ).
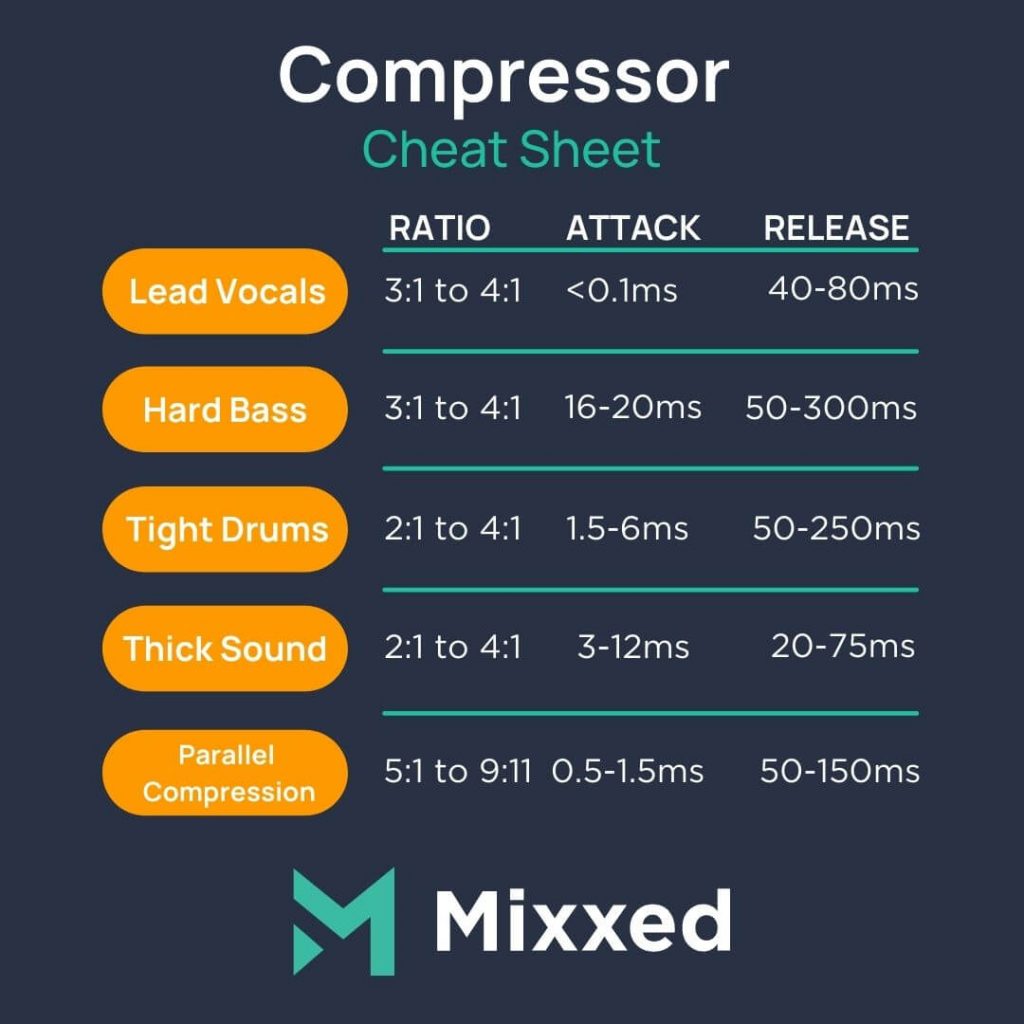
On your stems that need a bit of multiband compression, start off with a faster attack time and slowly raise it. Use a ratio of something low like 2:1 and test out moving up to 5:1 as a maximum. Don’t apply any more than 3dB of more gain reduction.
Now that your track is polished, it’s time for the final stage: limiting. But first, let’s apply a bit of soft clipping.
Soft clipping can sound pretty pleasant compared to hard clipping. Hard clipping means you cut the tips off of your soundwave and flatten it. Soft clipping, on the other hand, reduces gain but adds pleasing harmonics at the same time.
It’s best to use a plugin specifically designed for soft clipping to tackle this.
Finally, Limiting
To get your track competing with commercial music in terms of average volume, a limiter is your friend. Limiting will make sure your track does not hit any hard clipping and thus avoid digital pops and clicks. Limiting will chop the peak tips off of your waveform and make pops and clicks impossible.
Your goal with limiting is to make sure you’re affecting as little of your mix as you can. You only want to chop the loudest parts of your signal. To be more specific, use such a slight amount so that it isn’t noticeable. If you do notice it, just wind it back a little.
Every great song has one thing in common – great samples!
The sampling revolution has risen in popularity and shaped music since the early 1970s. Sample culture continues to transform how millions of artists and producers do their thing in DAWs.
You too can break conventional norms, challenge the status quo, and open Pandora’s box of sound design.
Mixxed works with a growing number of sample labels and contributors to provide you with an affordable sample subscription service that’s more accessible than any before.
You’ll have access to our growing catalogue of loops, one-shots and sound effects that you can browse, download and keep forever for less than $3 a month.
Sign up today to find your sound!